DIY Clay Springtail Culture
Mark AshworthShare
Our comprehensive guide for starting a springtail culture on clay will help you excel at rearing certain springtails at a higher level. Through lots of trial and error, we can recommend rearing the following species on clay:

- White Springtails (Folsomia candida or Collembola)
- Blue Podura Springtails (Proisotoma minuta)
- Bylas Ant Springtails (Pseudosinella violenta)
- Pearlescent Springtails (Lepidocyrtus)
- Yellow "Albino" Springtails (Ceratophysella)
- Lilac Springtails (Ceratophysella)
If you're looking for our guide on rearing our other tropical species of springtails, check out this guide (coming soon).
This guide will cover the necessary materials, step-by-step instructions, and tips for maintaining a thriving springtail culture.
How to Start a Springtail Culture on Clay: A Step-by-Step Guide
Springtails (Collembola) are tiny, beneficial arthropods often used in bioactive enclosures to help break down organic matter and keep the environment clean. They’re easy to culture at home, especially using clay as a substrate.

Why Culture Springtails on Clay?
Clay is a popular substrate choice for springtail cultures because it retains moisture well, which is essential for springtail survival. Additionally, clay contains calcium which gets consumed by springtails and can effectively "gut load" them for consumption by small insectivores like reptiles and arachnids. Finally, clay provides an easily accessible field for collection of springtails from the culture.

Materials Needed
Before you start, gather the following materials:
- Clay Substrate: Choose a high-quality, natural clay like terracotta or horticultural clay. Avoid clay with any additives or chemicals. We highly recommend using a calicum-bearing clay like our Springtail SuperClay Not looking to mix your own clay? We offer ready-mixed, clay cultures

- Culture Container: A plastic or glass container with a lid. We highly recommend an airtight container with this guide as these specific species thrive in higher CO2, lower O2 environments which is easily achieved with an air-tight container. Plan on opening the container every 2-4 days for air exchanges and feeding.
- Springtail Starter Culture: You're only as good as your starter. We offer an amazing selection of Springtail Cultures here at MIBeneficials.com and would recommend finding a vendor that has credibility through reviews.
- Water: Use dechlorinated water, preferably distilled or rainwater, to maintain the right moisture level. We use distilled water exclusively for all our springtail cultures.
- Food: We highly recommend using brewers yeast along with other fungal dominant food sources like seed meals. We offer our Temperate Springtail Food and it is what we use exclusively for our commercial level rearing. Keep in mind that food is one of the biggest areas of contamination in a culture so make sure to use clean food that is stored in a sealed container and stored in the freezer.
Step-by-Step Instructions
1. Prepare the Container
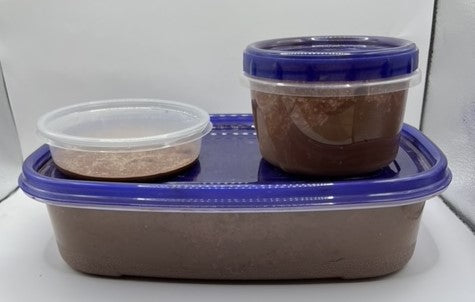
- Choose the Right Size: The container should be large enough to accommodate the springtails and allow them to reproduce. We like more, smaller containers as opposed to one or fewer large containers. The reason is, things can negatively affect cultures and when you have more, separate cultures, you are adding the ability to quarantine cultures that "go bad" with excessive mold or other contaminants. We like using 8oz containers with air tight lids with approximately 3oz of prepared clay substrate.

- Ventilation: Some springtail hobbyists use pore tape or small micron mesh over air vents on their containers to eliminate the need to manually open each container and provide air exchanges periodically. We do not use ventilation on our clay cultures because it makes it much harder to maintain optimal moisture levels in your cultures. If you're not able to check your containers at least once every three days to open it and provide an air-exchange, then some form of ventilation is probably right for you.
2. Prepare the Clay Substrate
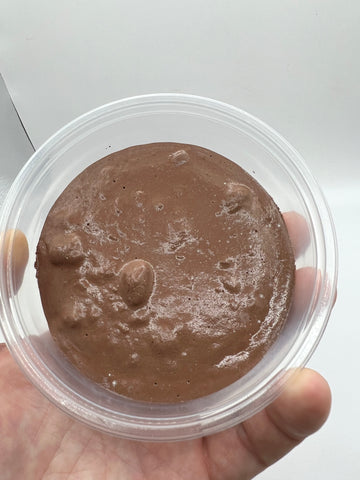
- Hydrate the Clay: Moisten the clay substrate before placing it in the container. It should be damp but not waterlogged. The texture should be firm but not sticky. We recommend erroring on the side of drier because too much moisture can cause your food to mold before the springtails are able to consume it.
3. Introduce the Springtails
- Transfer the Springtails: Add your preferred species of springtail to the prepared clay culture. Check out our amazing selection of tropical and temperate springtails!
- Add Food Source: When starting a springtail culture, it is imperative that you start with a VERY small amount of food. The food should be something powderized and not actual food (like rice or fruit), we recommend using our Temperate Springtail Superfood or something similar, the ingredients are listed.

4. Maintenance
- Moisture Levels: Throughout the life of the clay culture there will often times be a need to add moisture. You can tell when the culture needs moisture because the top of the clay will completely lose its sheen. If the clay starts to crack, it is very dry. To avoid this from happening, we recommend adding a very small amount of moisture to your culture once every 1-4 weeks (depending drastically on your climate). TIP: When feeding and adding moisture at the same time, make sure to put the water in one corner of the container and feed in another corner to avoid the food getting wet and soggy and creating excessive mold.
- Temperature: Keep your clay culture in a stable environment, ideally between 65-75°F (18-24°C). Avoid placing it in direct sunlight or in extremely cold areas of the house.
- Feeding: Feeding is the trickiest balance of clay springtail cultures, but we always recommend erroring on the side of underfeeding. When you overfeed, the worst thing that can happen is you kill the entire culture. When you underfeed, the worst that can happen is you hit a plateau in the reproduction levels. It is much easier to dial your feeding up slightly than to start an entire new culture after it crashes from overfeeding. With a brand new culture we would start with 1/4 tsp of powderized food at first and when fully established would never exceed 1 tablespoon per culture. Feeding is something that needs to be gradually eased in to for success.
5. Monitor and Harvest
- Population Growth: Population growth depends heavily on the species and you can expect to start seeing visible growth in your populations within 2-4 weeks.

- Harvesting: When your culture is thriving, you can start harvesting springtails to use in your bioactive enclosures. Gently tap the container over your enclosure, allowing springtails to fall into their new habitat, but make sure not to over harvest your cultures. TIP: It's very important to adjust your feeding down when you harvest from your cultures.
Tips for Success
- Avoid Overfeeding: This can't be overstated. Too much food can lead to excessive mold growth, which leads to excessive CO2 production which can lead to cultures crashing or vastly underproducing.
- Be Careful When Culturing Multiple Species: The quickest way to contaminate cultures is to co-mingle your feeding and maintenance of difference springtail culture species. When you open these cultures, the rush of oxygen causes them to start jumping which means they can get on your table, get into other open cultures and even get in your shirt. We recommend being mindful of this and only working on one culture at a time and cleaning your area before going into other species.
- More Small Cultures: If you're looking for long-term success, we recommend considering more smaller cultures, rather than one big culture. Keeping your cultures small and inexpensive means you can start new ones periodically to ensure you don't lose a population to contamination or crash.
- Don't Get Your Food Wet: Just as stated, keep added moisture away from added food to your clay cultures. We recommend adding water
This guide should provide all the information needed to start and maintain a successful springtail culture on clay. Happy culturing!
